Introduction: In
this post I try to explain how we can insert the Data into Database using Three
Tier Architecture with SqlHelper.cs
file in Asp.net.
Description:
I have created a table name STUDENT_DETAIL. Here STUDENT_ID
is primary key.
STUDENT_ID
|
int
|
STUDENT_NAME
|
varchar(50)
|
STUDENT_ADDRESS
|
varchar(50)
|
STUDENT_CLASS
|
varchar(50)
|
Also create a store procedure to insert Data:
CREATE PROCEDURE INSERT_STUDENT_DETAIL
(
@STUDENT_NAME VARCHAR(50),
@STUDENT_ADDRESS VARCHAR(50),
@STUDENT_CLASS VARCHAR(50)
)
AS
BEGIN
SET NOCOUNT
ON;
INSERT INTO dbo.STUDENT_DETAIL(STUDENT_NAME,STUDENT_ADDRESS,STUDENT_CLASS) VALUES (@STUDENT_NAME,@STUDENT_ADDRESS,@STUDENT_CLASS)
END
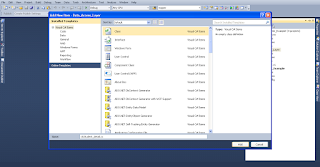
Now start the Visual Studio and go to File >> New >> Project as the shown in attached
snapshot:
Here I take the project name Three_Tier_Example and save location to Three_Tier folder. After that clicks on Solution Explorer and right click>> Add >> New Project >> Class Library as mention
in below attached snapshot:
Here I select the Class
library and gave name Data_Access_Layer
and save location to Three_Tier
folder. After that once again use the same procedure and add new project >> Class Library and
named it Bussiness_Layer and save
location to Three_Tier folder as
shown in attached snapshot:
Now you see a structure as mention in below attached
snapshot:
To download the Sql Helper class Click Here. After download put the SqlHelper.cs file in Data_Access_Layer.
Now add a new Class to Data_Access_Layer.
Here I add a class named clsStudent_detail.cs as mention in below attached
snapshot:
Write the following code to class:
public class clsStudent_detail
{
public int STUDENT_ID{get; set;}
public string STUDENT_NAME{get;
set;}
public string STUDENT_ADDRESS{get;
set;}
public string STUDENT_CLASS { get;
set; }
}
After that add a new class to Bussiness_Layer. Here I add a class Student_Detail.cs as shown in below attached snapshot:
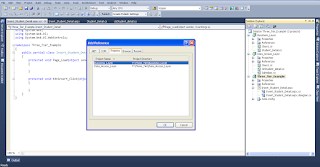
Note: Build the
project and add reference of Data_Access_Layer
to the Bussiness_Layer as shown
below:
Write the below mention code to the class:
using
System.Data;
using
System.Data.SqlClient;
using
System.Configuration;
using
Microsoft.ApplicationBlocks.Data;
using
Data_Access_Layer;
namespace
Bussiness_Layer
{
[Serializable]
public class Student_Detail
{
public string Con
{
get;
set;
}
public bool InsertData(clsStudent_detail
objstudent)
{
SqlParameter[]
param = new SqlParameter[3];
try
{
param[0] = new SqlParameter("@STUDENT_NAME", Convert.ToString(objstudent.STUDENT_NAME));
param[1] = new SqlParameter("STUDENT_ADDRESS", Convert.ToString(objstudent.STUDENT_ADDRESS));
param[2] = new SqlParameter("@STUDENT_CLASS", Convert.ToString(objstudent.STUDENT_CLASS));
SqlHelper.ExecuteNonQuery(Con,
"INSERT_STUDENT_DETAIL", param);
}
catch
(Exception ex)
{
return
false;
}
finally
{
}
return
true;
}
}
}
Note: Once again build the project and add the reference of Data_Access_Layer and Bussiness_Layer
to Three_Tier_Example as shown
in below attached snapshot:
Now add a new webform to project. Drag and drop the control
from Toolbox.
<table border="1px"><tr><td><b>Three Tier Architecture Exmaple to Insert Data in
Databse</b></td></tr><tr><td>
<table>
<tr><td>Student Name:</td><td>
<asp:TextBox ID="txtname" runat="server"></asp:TextBox></td></tr>
<tr><td>Student
Address:</td><td>
<asp:TextBox ID="txtaddress" runat="server"></asp:TextBox></td></tr>
<tr><td>Student
Class:</td><td>
<asp:TextBox ID="txtclass" runat="server"></asp:TextBox></td></tr>
<tr><td></td><td>
<asp:Button ID="btninsert" runat="server" Text="Insert"
onclick="btninsert_Click" /></td></tr>
</table></td></tr></table>
Now go to .aspx.cs page and write the below mention code:
using
Data_Access_Layer;
using
Bussiness_Layer;
using
System.Data;
using
System.Configuration;
clsStudent_detail
objstudentdata = new clsStudent_detail();
Student_Detail
objbussiness;
protected
void Page_Load(object
sender, EventArgs e)
{
Test_Connection();
}
protected
void btninsert_Click(object
sender, EventArgs e)
{
objstudentdata.STUDENT_NAME = Convert.ToString(txtname.Text);
objstudentdata.STUDENT_ADDRESS = Convert.ToString(txtaddress.Text);
objstudentdata.STUDENT_CLASS = Convert.ToString(txtclass.Text);
if
(objbussiness.InsertData(objstudentdata) == true)
{
Response.Write("Records Save Successfully");
}
Clear();
}
public void Test_Connection()
{
objstudentdata = new clsStudent_detail();
objbussiness = new Student_Detail();
if
(objbussiness.Con == null)
{
objbussiness.Con = ConfigurationManager.ConnectionStrings["Connection"].ToString();
}
}
public void Clear()
{
txtname.Text = "";
txtaddress.Text = "";
txtclass.Text = "";
}
}
Now build and run the project and check the result.
If yes post your comment to admire my work. You can like me on Facebook, Google+, Linkedin and Twitter via hit on Follow us Button and also can get update follow by Email.


.png)


No comments:
Post a Comment